Ok, this is the post for the Totes and Kids Craft Tutorials.
Totes/Bags-
Zest Tote by JoAnn
Lined Drawstring Bag
Denim Do-it-All Bins
Kids/Mom Crafts-
Fancy Fleece Flowers
Treat Box
Gift Box
Colored "Glass"- a winter tutorial
Envelope Tutorials
All Other Tutorials-
Birdie Pincushion
Travel Sewing Kit
Thimble/Coin Holder
How to put in an invisiable zipper
Fabric Flower Pin
Practical Tutorials-
Single Use Antibiotic Packs
Showing posts with label Tutorial. Show all posts
Showing posts with label Tutorial. Show all posts
Saturday, December 17, 2011


Sunday, December 4, 2011
Sewing Tutorials!
Well for all of you who sew out there this is a post for you. Like many of you I love tutorials! I like to see what others create. So along those lines I decided I would create a post linking to all of the great tutorials I have found. This will help me too not to forget where I found things when I want to find them again either. This will be an ongoing post that will be labeled under my tutorial section to the right. If anyone knows of a great tutorial, please leave a link in the comments so I can add it to the list. I will take ones for more then just sewing too! We love tutorials for kids crafts too, maybe that should be a seperate post. Hmm, ya I will post a seperate one for that later. You may notice that alot of my post are for girls, well I make mostly girl stuff until now, now there is a nephew to create for, so I welcome boy tutorials too. Here we go-
Babies-
Gotcha Bib by JoAnn
Cloth Baby Shoes
Over the Head Baby Bib
Tie Baby Big
Diaper Clutch
Girls-
Twirly T Shirt Dress One of my favorites
"In the Garden" Shirred Twirly Dress
Knot Dress
Twirly Skirt
Men's Dress Shirt Dress
Men's Dress Shirt Dress 2
Caplet
Child's Sleeveless
Wrap Skirt
Patchwork Circle Skirt
Tiered Skirt
Tiered Skirt 2
20 Minute Skirt
Ruffled Skirt
Ruffled Skirt 2
Lazy Days Skirt
Ruffle Sleeve Top
Skort
Ruffly Patchwork Dress
Sundress w/Shirred Back
Shirred Sunny Day Dress
Zest Dress by JoAnn
Kid's Poncho by JoAnn
A Line Skirt
Boys-
Boy's Tie from a Man's Tie
Unisex-
Sweater Mittens
Kids Lounge pants from T-Shirt
Babies-
Gotcha Bib by JoAnn
Cloth Baby Shoes
Over the Head Baby Bib
Tie Baby Big
Diaper Clutch
Girls-
Twirly T Shirt Dress One of my favorites
"In the Garden" Shirred Twirly Dress
Knot Dress
Twirly Skirt
Men's Dress Shirt Dress
Men's Dress Shirt Dress 2
Caplet
Child's Sleeveless
Wrap Skirt
Patchwork Circle Skirt
Tiered Skirt
Tiered Skirt 2
20 Minute Skirt
Ruffled Skirt
Ruffled Skirt 2
Lazy Days Skirt
Ruffle Sleeve Top
Skort
Ruffly Patchwork Dress
Sundress w/Shirred Back
Shirred Sunny Day Dress
Zest Dress by JoAnn
Kid's Poncho by JoAnn
A Line Skirt
Boys-
Boy's Tie from a Man's Tie
Unisex-
Sweater Mittens
Kids Lounge pants from T-Shirt
Tuesday, May 17, 2011
It has been a while and a tutorial!
Well it has been a while since I have posted anything, I'm always way to busy and when I have free time I like to read other people's blogs, some of my favs are Ucreate, The Sewing Dork, and The Long Thread. They all have some really great tutorials!
Check out the May 23rd giveaway that Sew, Mama, Sew is hosting http://sewmamasew.com/blog2/2011/05/may-giveaway-day-3/
Speaking of tutorials, I was a nut and decided that my kiddo needed to give every little kid in the Kindergarten class a going away present for the summer. There are 16 kiddos in the class. We tried to keep to a summer theme, you know, little buckets with shovels, bubbles, sidewalk chalk, etc, but we also decided that it would be fun to make something personal for each kid, pencil toppers! What was I thinking? pencil toppers? Well it started out as just one pencil with topper for each kid and then it became 2 pencils with toppers for each kid, my kiddo would have loved to do 20 for each kid, but we agreed 2 would be enough. So here it goes the tutorial, let me know if you need more directions, not sure if I took enough pics or not, my little one wanted more and more pics, such a camera ham I have, oh and the little fingers, are my little helper-
 Pencil Toppers 1 by 1 ;)
What you will needed:
1 Little Helper
Felt in various colors (Got mine at JoAnn's)
Pkg of Heat n Bond ultra bond no sew adhesive
Freezer paper
Fabric Glue (I used Liquid Fusion)
Decorations (Glitter, buttons, etc)
Pieces of paper 1/2" strips about 2 to 3" long
Scissors with a sharp point
Pencils
Iron and board
NOTE OF CAUTION: When you iron, the paper and the felt get hot fast, make sure to let cool completely before you or the little one touch, we don't want anyone getting burned.
First I searched the web for some clip art designs, or pictures I could use to create my designs (I can not draw to save my life so this seemed like the best way). We decided on some of the basics, hearts, starts, trains, footballs etc. then I copied them to a word doc and adjusted the size to what I thought would be good for a pencil topper and printed them out. Next I used a black sharpie and just went around the edges of the designs so that I would be able to see them better through the freezer paper and heat-n-bond paper. Then I traced with a pencil the designs onto both the freezer paper and the heat n bond paper.

 Some of my designs had inside designs as well, like the football had the white strips and the black lacing strip (Oh, didn't realize till after that the lacing is actually white on a football, oops!), I copied them onto just the heat n bond paper. The purpose of the freezer paper is just to cut out a backing for the topper, so everything else is traced onto the heat n bond paper. Now cut out your designs, I left a little gap around the pencil marks as a buffer for cutting. Choose your felt color and iron both the freezer paper and the heat n bond on, I found that it was a good idea to iron a piece of freezer paper over my ironing board first, helps prevent accidently ironing the heat n bond to your board, voice of experience here, I will have to sew me a new board cover. WAIT- One VERY, VERY important step, make sure that when you are placing the heat n bond down that you decide where you want your pencil to stick in and slip that little piece of 1/2" paper under the heat n bond about 2/3rds of the way in, in other words between the heat n bond and the flet, this creates your pocket for the pencil. I found that it was better to make pockets on the sides of some of my designs instead of at the bottom where there might be a point or it would just be difficult to get the pencil in. My iron was set to wool and it only takes about 2-3 seconds of holding it down firm, I did have some issues with the felt staying on the iron when I picked it up, just used the point of my scissors to knock it off. (I did not have any issues with the felt melting, but you might want to test it first since I know not all felt is the same, mine was EcoFi).

 Notice you can see the little piece of paper sticking out for the pencil pocket.
 After ironing them all on, I began cutting them out. Because I did so many at a time I noticed that the freezer paper started peeling on some of them, just had to reheat them and they were fine.


 Not sure if you can see it our not but my little helper is showing you that you will be left with a bare spot on the felt that does not have glue. Now lay one glue covered felt over one none glue felt, line up good and iron again.
 Let cool and you are ready to decorate! We did glitter on this butterfly. Oh, one good thing with the felt, it was easy to use the glue and make designs and then pour liberal amounts of glitter over it and guess what, you got it! the glitter just fell right off, only stuck to the glue which is what we wanted.

 Time to put on the pencil to dry and you are done! One down 31 more to go!
 And belive it or not they are all done!

Hope you enjoyed this tute, sorry if it was long, it was my first! Now go find a little helper and make your own pencil toppers!
Check out the May 23rd giveaway that Sew, Mama, Sew is hosting http://sewmamasew.com/blog2/2011/05/may-giveaway-day-3/
Speaking of tutorials, I was a nut and decided that my kiddo needed to give every little kid in the Kindergarten class a going away present for the summer. There are 16 kiddos in the class. We tried to keep to a summer theme, you know, little buckets with shovels, bubbles, sidewalk chalk, etc, but we also decided that it would be fun to make something personal for each kid, pencil toppers! What was I thinking? pencil toppers? Well it started out as just one pencil with topper for each kid and then it became 2 pencils with toppers for each kid, my kiddo would have loved to do 20 for each kid, but we agreed 2 would be enough. So here it goes the tutorial, let me know if you need more directions, not sure if I took enough pics or not, my little one wanted more and more pics, such a camera ham I have, oh and the little fingers, are my little helper-
 Pencil Toppers 1 by 1 ;)
What you will needed:
1 Little Helper
Felt in various colors (Got mine at JoAnn's)
Pkg of Heat n Bond ultra bond no sew adhesive
Freezer paper
Fabric Glue (I used Liquid Fusion)
Decorations (Glitter, buttons, etc)
Pieces of paper 1/2" strips about 2 to 3" long
Scissors with a sharp point
Pencils
Iron and board
NOTE OF CAUTION: When you iron, the paper and the felt get hot fast, make sure to let cool completely before you or the little one touch, we don't want anyone getting burned.
First I searched the web for some clip art designs, or pictures I could use to create my designs (I can not draw to save my life so this seemed like the best way). We decided on some of the basics, hearts, starts, trains, footballs etc. then I copied them to a word doc and adjusted the size to what I thought would be good for a pencil topper and printed them out. Next I used a black sharpie and just went around the edges of the designs so that I would be able to see them better through the freezer paper and heat-n-bond paper. Then I traced with a pencil the designs onto both the freezer paper and the heat n bond paper.
 Some of my designs had inside designs as well, like the football had the white strips and the black lacing strip (Oh, didn't realize till after that the lacing is actually white on a football, oops!), I copied them onto just the heat n bond paper. The purpose of the freezer paper is just to cut out a backing for the topper, so everything else is traced onto the heat n bond paper. Now cut out your designs, I left a little gap around the pencil marks as a buffer for cutting. Choose your felt color and iron both the freezer paper and the heat n bond on, I found that it was a good idea to iron a piece of freezer paper over my ironing board first, helps prevent accidently ironing the heat n bond to your board, voice of experience here, I will have to sew me a new board cover. WAIT- One VERY, VERY important step, make sure that when you are placing the heat n bond down that you decide where you want your pencil to stick in and slip that little piece of 1/2" paper under the heat n bond about 2/3rds of the way in, in other words between the heat n bond and the flet, this creates your pocket for the pencil. I found that it was better to make pockets on the sides of some of my designs instead of at the bottom where there might be a point or it would just be difficult to get the pencil in. My iron was set to wool and it only takes about 2-3 seconds of holding it down firm, I did have some issues with the felt staying on the iron when I picked it up, just used the point of my scissors to knock it off. (I did not have any issues with the felt melting, but you might want to test it first since I know not all felt is the same, mine was EcoFi).
 Notice you can see the little piece of paper sticking out for the pencil pocket.
 After ironing them all on, I began cutting them out. Because I did so many at a time I noticed that the freezer paper started peeling on some of them, just had to reheat them and they were fine.
 Now cut out the heat n bond ones, no need to be careful on the paper tab that is sticking out, just cut right over it.
 Peel the paper off and you will have just the glue and the paper strip left, next carefully peel the little piece of paper off, it worked best when we started at the edge and gently lifted and peeled back and then just peeled sidewise at the end.


 Not sure if you can see it our not but my little helper is showing you that you will be left with a bare spot on the felt that does not have glue. Now lay one glue covered felt over one none glue felt, line up good and iron again.
 Let cool and you are ready to decorate! We did glitter on this butterfly. Oh, one good thing with the felt, it was easy to use the glue and make designs and then pour liberal amounts of glitter over it and guess what, you got it! the glitter just fell right off, only stuck to the glue which is what we wanted.
 Time to put on the pencil to dry and you are done! One down 31 more to go!
 And belive it or not they are all done!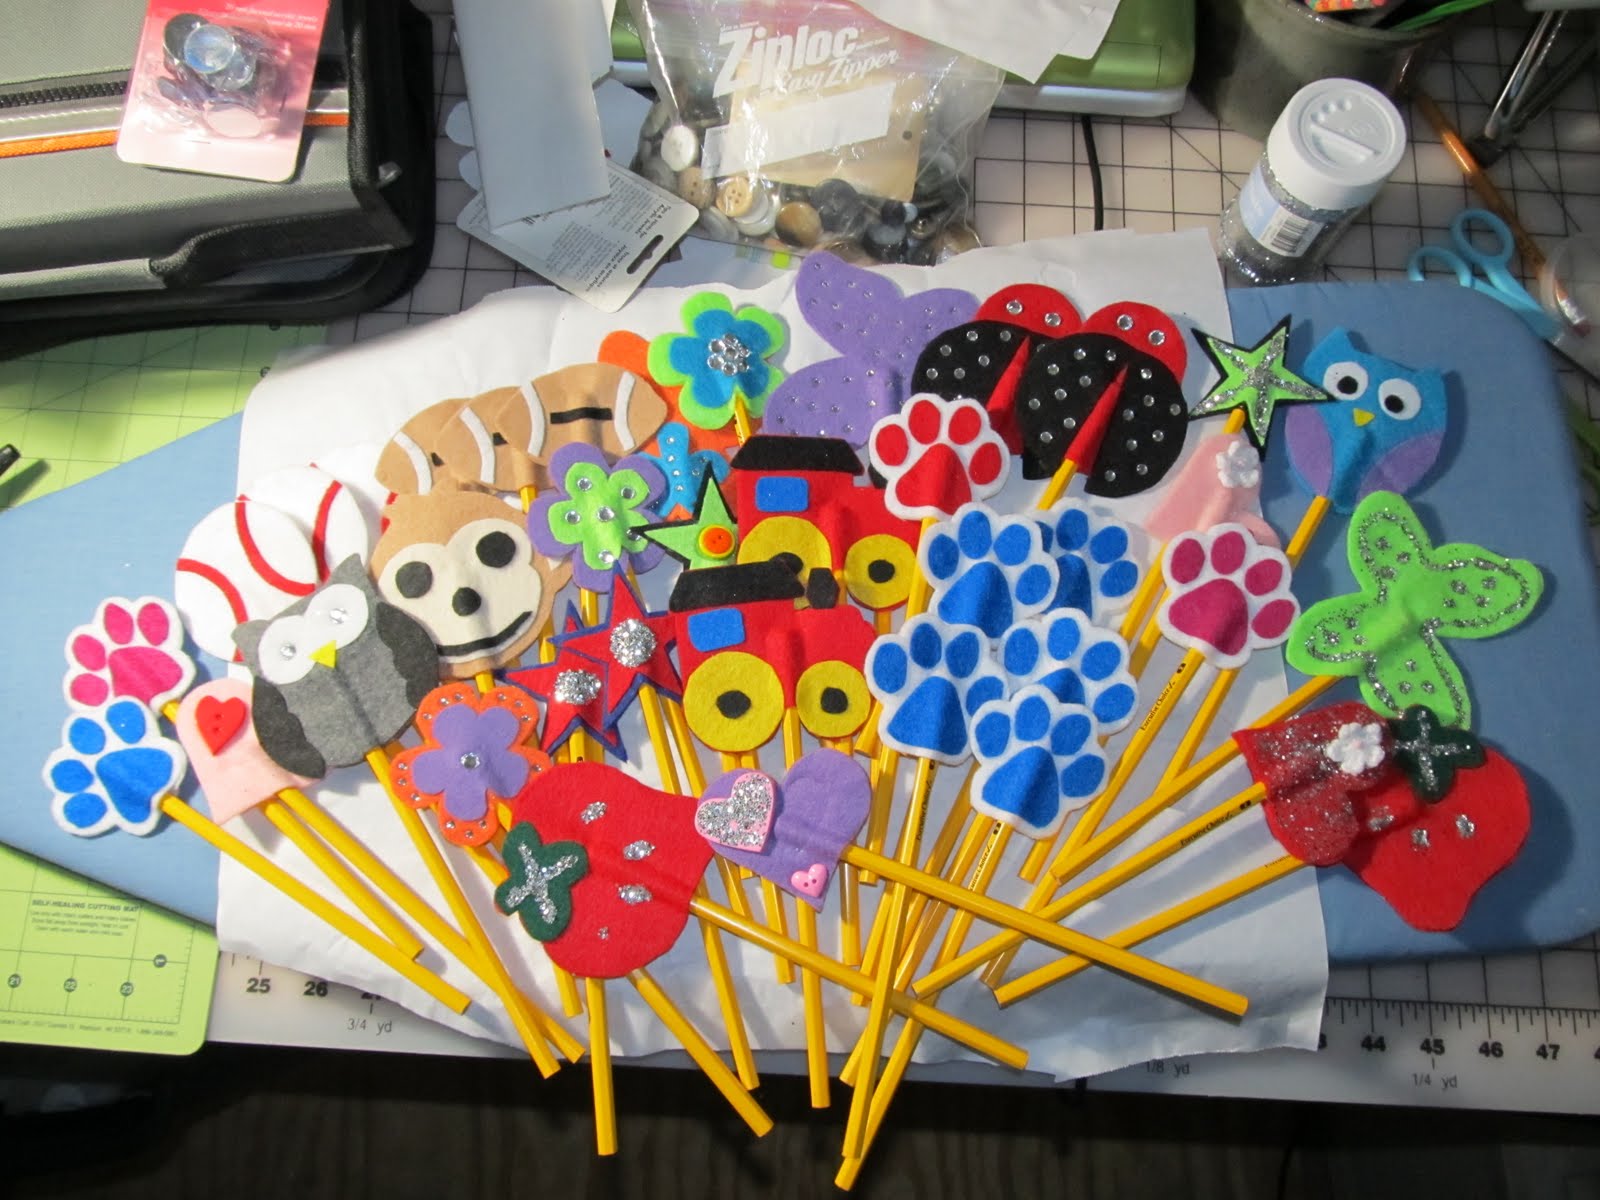
Hope you enjoyed this tute, sorry if it was long, it was my first! Now go find a little helper and make your own pencil toppers!
Subscribe to:
Posts (Atom)